Featured Colors

We used the product above. But you can view more Wall & Trim or Ceiling products.
Additional Supplies
- Purdy® mini woven roller cover and roller frame
- Purdy® mini tray
- Painter's tape
- Tape measure
- Pencil
- Thumbtack
- String
- Drop cloth
- Clean, damp cloth
- Clock kit
- Metal house numbers (various styles)
- Level
Available Exclusively at Menard’s
Free store pickup where available.
Step 1:
Wipe ceiling with clean, damp cloth to prepare painting surface.
Step 2:
Lay down the drop cloth to protect floors.
Step 3:
Determine diameter of circle; find the central point on the wall where you want to place the clock, and lightly mark with the pencil.
Step 4:
Cut a piece of string half the diameter of the circle.
Step 5:
Tie one end of string tightly around the pencil and secure the other end to the middle point on the wall with the thumbtack.
Step 6:
Starting at bottom and keeping string taut, lightly draw a circle by moving pencil clockwise until circle is complete.
Step 7:
Affix painter's tape to outside edge of the circle, using small strips of tape to create rounded edges; press tape firmly to wall to ensure a tight seal.
Step 8:
With the mini woven roller, paint inside the taped circle.
Step 9:
Remove tape while paint is still damp; clean up any mistakes with the clean, damp cloth; allow paint to dry, following suggested drying time on the can label.
Step 10:
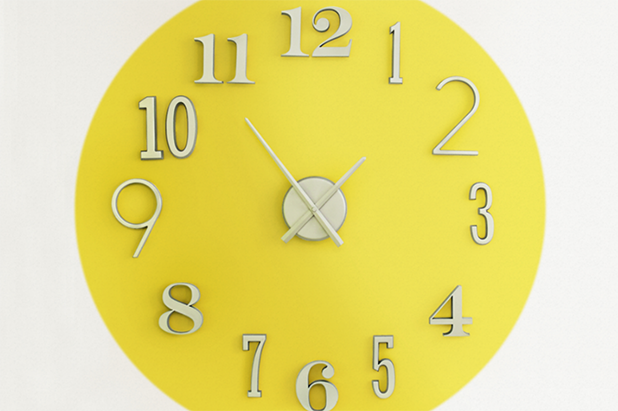
Following clock kit instructions, mount motor and arms directly over center of circle.
Step 11:
Mount numbers just inside painted area, starting with numbers 12, 3, 6 and 9, and then mount the remainder, if desired, spacing evenly.
Show off your project.
Were you inspired by one of our ideas? We’d love to see. And share. Tag @dutchboypaints on Instagram to have your project featured.